概要
RichTextBoxは、リッチテキストが扱える、コンテナです。
ツールバーに、RichTextBoxコンポーネントの内容を書式設定する機能を追加します。 これらの機能は、EditingCommands クラスのメソッドとして提供されています。これを利用すると簡単にコマンドを実装できます。
コードの使い方
新規にWPFアプリケーションを作成して、張り付けます。
その場合は、Xamlコードの一番上に、<Windows>タグのx:Class属性に、[プロジェクト名].[コード名]が
記載されていますので、この部分を変更します。
例
<Window x:Class="RichTextBox001.MainWindow"
編集コマンドを追加する
編集コマンドを使用することで、ユーザーは RichTextBox 内の編集可能コンテンツの書式設定をすることができます。 編集コマンドは、RichTextBoxにメソッドとして内臓されているので、簡単なコードで利用することができます。
<Window x:Class="RichTextBox001.MainWindow"
        xmlns="http://schemas.microsoft.com/winfx/2006/xaml/presentation"
        xmlns:x="http://schemas.microsoft.com/winfx/2006/xaml"
        Title="MainWindow" Height="255.556" Width="500.556">

    <Grid>

        <!-- Set the styles for the tool bar. ツールバーのために、スタイルを設定します。 -->

        <Grid.Resources>
            <Style TargetType="{x:Type Button}" x:Key="formatTextStyle">
                <Setter Property="FontFamily" Value="Palatino Linotype"></Setter>
                <Setter Property="Width" Value="30"></Setter>
                <Setter Property="FontSize" Value ="14"></Setter>
                <Setter Property="CommandTarget" Value="{Binding ElementName=mainRTB}"></Setter>
            </Style>

            <Style TargetType="{x:Type Button}" x:Key="formatImageStyle">
                <Setter Property="Width" Value="30"></Setter>
                <Setter Property="CommandTarget" Value="{Binding ElementName=mainRTB}"></Setter>
            </Style>
        </Grid.Resources>

        <DockPanel Name="mainPanel">

            <!-- This tool bar contains all the editing buttons.
                このツールバーには、すべての編集ボタンが含まれています。-->

            <ToolBar Name="mainToolBar" Height="30" DockPanel.Dock="Top">

                <Button Style="{StaticResource formatImageStyle}"
                	Command="ApplicationCommands.Cut" ToolTip="Cut">
                    <Image Source="Images\EditCut.png"></Image>
                </Button>
                <Button Style="{StaticResource formatImageStyle}"
		Command="ApplicationCommands.Copy" ToolTip="Copy">
                    <Image Source="Images\EditCopy.png"></Image>
                </Button>
                <Button Style="{StaticResource formatImageStyle}"
		Command="ApplicationCommands.Paste" ToolTip="Paste">
                    <Image Source="Images\EditPaste.png"></Image>
                </Button>
                <Button Style="{StaticResource formatImageStyle}"
		Command="ApplicationCommands.Undo" ToolTip="Undo">
                    <Image Source="Images\EditUndo.png"></Image>
                </Button>
                <Button Style="{StaticResource formatImageStyle}"
		Command="ApplicationCommands.Redo" ToolTip="Redo">
                    <Image Source="Images\EditRedo.png"></Image>
                </Button>

                <Button Style="{StaticResource formatTextStyle}"
		Command="EditingCommands.ToggleBold" ToolTip="Bold">
                    <TextBlock FontWeight="Bold">B</TextBlock>
                </Button>
                <Button Style="{StaticResource formatTextStyle}"
		Command="EditingCommands.ToggleItalic" ToolTip="Italic">
                    <TextBlock FontStyle="Italic" FontWeight="Bold">I</TextBlock>
                </Button>
                <Button Style="{StaticResource formatTextStyle}"
		Command="EditingCommands.ToggleUnderline" ToolTip="Underline">
                    <TextBlock TextDecorations="Underline" FontWeight="Bold">U</TextBlock>
                </Button>
                <Button Style="{StaticResource formatImageStyle}"
		Command="EditingCommands.IncreaseFontSize" ToolTip="Grow Font">
                    <Image Source="Images\CharacterGrowFont.png"></Image>
                </Button>
                <Button Style="{StaticResource formatImageStyle}"
		Command="EditingCommands.DecreaseFontSize" ToolTip="Shrink Font">
                    <Image Source="Images\CharacterShrinkFont.png"></Image>
                </Button>

                <Button Style="{StaticResource formatImageStyle}"
		Command="EditingCommands.ToggleBullets" ToolTip="Bullets">
                    <Image Source="Images\ListBullets.png"></Image>
                </Button>
                <Button Style="{StaticResource formatImageStyle}"
		Command="EditingCommands.ToggleNumbering" ToolTip="Numbering">
                    <Image Source="Images/ListNumbering.png"></Image>
                </Button>
                <Button Style="{StaticResource formatImageStyle}"
		Command="EditingCommands.AlignLeft" ToolTip="Align Left">
                    <Image Source="Images\ParagraphLeftJustify.png"></Image>
                </Button>
                <Button Style="{StaticResource formatImageStyle}"
		Command="EditingCommands.AlignCenter" ToolTip="Align Center">
                    <Image Source="Images\ParagraphCenterJustify.png"></Image>
                </Button>
                <Button Style="{StaticResource formatImageStyle}"
		Command="EditingCommands.AlignRight" ToolTip="Align Right">
                    <Image Source="Images\ParagraphRightJustify.png"></Image>
                </Button>
                <Button Style="{StaticResource formatImageStyle}"
		Command="EditingCommands.AlignJustify" ToolTip="Align Justify">
                    <Image Source="Images\ParagraphFullJustify.png"></Image>
                </Button>
                <Button Style="{StaticResource formatImageStyle}"
		Command="EditingCommands.IncreaseIndentation" ToolTip="Increase Indent">
                    <Image Source="Images\ParagraphIncreaseIndentation.png"></Image>
                </Button>
                <Button Style="{StaticResource formatImageStyle}"
		Command="EditingCommands.DecreaseIndentation" ToolTip="Decrease Indent">
                    <Image Source="Images\ParagraphDecreaseIndentation.png"></Image>
                </Button>

            </ToolBar>

            <!-- By default pressing tab moves focus to the next control.
            既定では、タブを押すと、フォーカスを次のコントロールへ移動します。
            Setting AcceptsTab to true allows the RichTextBox to accept tab characters.
            AcceptsTab設定をtrueにすると、RichTextBoxは、タブ文字を受け取ることができます。-->

            <RichTextBox Name="mainRTB" AcceptsTab="True"></RichTextBox>
        </DockPanel>
    </Grid>
</Window>
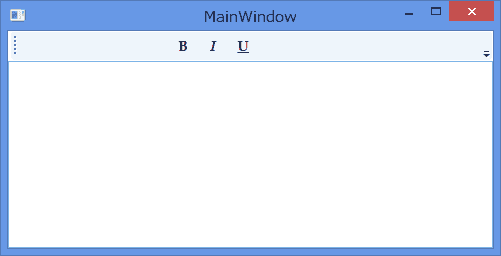
アイコンが登録されていないので、表示されません。アイコンは、自分で登録する必要があります。
そのため、このままでは使用できません。
アイコンイメージをリソースに追加したら、メニューバーのビルド」「ソリューションのリビルド」を選択し、ツールバーから開始、 アイコンをクリックして、ディバッグビルドすると、ビルドしたプロジェクトに、ツールバーアイコンが表示されました。
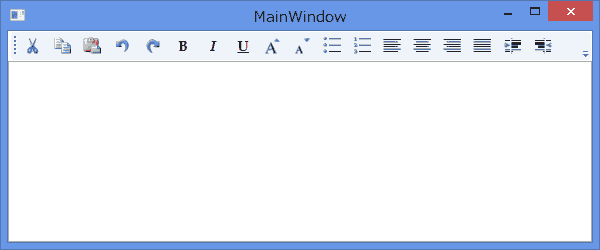
文字を入力し、実際に、編集機能を使って動作を確認しましょう。
次のページの内容
アイコンイメージをリソースに追加する
次のページでは、プログラム内で、アイコンイメージなどの画像を使う際に、必要は操作である。イメージファイルをリソースに追加する方法を説明します。
参考リンク
RichTextBox の概要 (外部リンク)
ツール バーのある RichTextBox の作成のサンプル (外部リンク)
ここから、プロジェクトファイル (外部リンク)をダウンロードすることができます。
RichTextBoxクラス(msdn)(外部サイト)
EditingCommandsクラス(外部サイト)
動作確認環境
- WIndows 8.1 pro 64bit
- Visual Studio Express 2013 for Desktop